In my home, I saw how water filters began to rise in demand. Many American and Canadian households started using them because people became more health conscious. I noticed myself increasing my water intake, and I was always paying attention to the drinking water quality. Good water filters can reduce contaminants, make tap water safer, and give it a better tasting feel. If you want the filter to keep working, it will need regular maintenance.
The maintenance required can vary greatly. It depends on the type or brand of water filter you own. I have learned that maintaining some models can be low-fuss and even budget-friendly like HomeWater filters, while others require a plumber and a larger financial investment.
In this article, I will dive deep into water filter maintenance. There are various types of water filters, and I will also tell you how I look after mine at home. It feels like sharing my own story because I’ve been through the routine myself.
Why Do Water Filters Need Maintenance?
When I first set up my water filters, I thought they were designed to always remove impurities from my tap water. But as time passes, the filter cartridges begin to clog. Without regular maintenance, the filter stops protecting the faucet and lets unwanted substances slip into my glass. A filter not performing at its peak leaves you exposed to a range of waterborne contaminants like bacteria and even heavy metals.
The effectiveness of a water filter system declines over time. I once poured a glass and noticed contaminants like chlorine, bacteria, and metals that my filters used to block. The taste and smell of the water started to reflect poor quality. It grew worse, and it began to discourage my family from staying hydrated without even realizing it.
I also learned that if you want your filter to last a long time, it needs to be well-maintained. With proper maintenance, you can extend the lifespan of your water filter. It may take some work, but regular upkeep becomes a cost-effective investment when you see the benefits.
Another thing I noticed was water pressure. Clean water pressure is important to me. My HomeWater filters were designed not to sacrifice flow rate while giving me clean water. But without regular maintenance, filter changes were missed, and debris started to build inside. Soon, I began to lose that coveted flow.
The safety of your water depends on how filter systems are maintained. If ignored, they can breed bacteria and mold. The filter materials may even break down into the water supply. By performing recommended water filter maintenance, I make sure the tap still gives me clean water every day.
How Do You Maintain a Water Filter?
From my own experience, maintaining a water filter really doesn’t feel like a daunting task. With just a few simple steps and regular checks, I can ensure my water filter remains effective for many years to come.
Here’s what I learned: everything is based on the type of water filter you own. Some are easy, others take more care, but once you know the system, it becomes part of daily life at home.
Activated Carbon Filters
I started with activated carbon filters because they are the most common filters on the market. They work by attracting and adsorbing contaminants like chlorine and organic compounds onto a large surface area. I could tell the difference in taste right away when I switched mine at home.
How to Maintain an Activated Carbon Filter
The first step is to check for clogs. A reduced water flow can indicate a clog, and then it’s time to replace the cartridge if needed. I remember one time my sink slowed down, and it was just this simple issue.
I also learned to regularly replace water filter cartridges. As hundreds or even thousands of gallons of water pass through the filter, the effective surface area gets saturated. That means I need new filter cartridges to keep everything running.
Another habit I keep is to sanitize. It is recommended by the manufacturer to periodically use a sanitizing solution as indicated in the filter guidelines. This helps to keep bacterial growth at bay, and I’ve seen it make a real difference in my system’s life.
How Often Should You Replace Activated Carbon Filter Cartridges?
From my practice at home, I know that typically replacements are done every three to six months. I always check the manufacturer’s guidelines to see how often cartridges should be replaced.
The amount of time between changes can depend on many factors. The size of the filter, whether there are pre-filters to capture larger debris, and the types and amounts of contaminants being filtered all matter. The contact time the filter has with water, and how many gallons of water have passed, also guide me.
Reverse Osmosis Systems
In my house, I tried reverse osmosis systems or RO systems because they work by pushing water through tiny holes in a reverse osmosis membrane. These holes are so small they only allow water molecules through.
This makes them highly effective filters for even small microorganisms and viruses that can slip past other filters. But I did notice it can take time to push a meaningful amount of water through the membrane. That means some waiting at the tap.
To fix that, my RO system came with a storage tank. It holds filtered water so it’s ready when I need it. This storage made it easy for my family to use without delay.
How to Maintain a Reverse Osmosis Filtration System
The first thing I do is check pre-filters. In my RO systems, the membranes are delicate and can get clogged easily. That’s why most setups include pre-filters, sediment filters, and even water polishers. These need to be checked from time to time and replaced on a proper schedule.
I also run a system flush. I do this periodically, letting the flush clear buildup in the membrane. Some RO system units even do this automatically, but I like making sure it’s done right.
Another habit is regular cleaning. Every few weeks, it’s a good idea to clean the water storage tank, especially if it’s installed under a sink I don’t use often. This small step keeps my water fresh and safe.
How Often Should You Replace a Reverse Osmosis Membrane?
In my case, the RO membrane had to be replaced every 24 months. I always check my model’s guidelines to be sure. Along with this, the sediment pre-filter, pre-carbon filter, and post-carbon filter should be replaced every six to 12 months or even sooner depending on usage. Following this schedule kept my water fresh.
Ultraviolet Light Filters
I also use UV disinfection systems. These use ultraviolet light waves to deactivate DNA in microbial contaminants like protozoan, cysts, and viruses. UV light filters are often part of a multistage system in home filtration systems. They are favored since they avoid chemicals and still give me a safe glass of water.
How to Maintain a UV Light Filter
To keep mine in shape, I clean the system often. The light is important, so the quartz sleeve the light passes through must stay clean. These systems need care every few months for optimal UV transmission.
I also check electrical connections. The electrical components must stay dry and securely connected, especially if I do any work in the area. That way the filter keeps running without issues.
How Often Should You Replace a UV Lamp?
For optimal disinfection performance, it is recommended to replace the lamp every year. I follow this rule at home, and it keeps my system strong.
Whole Home Systems
A whole house water treatment system is designed to filter water for the entire home. It gives me clean and safe water at every tap. These systems often combine multiple filtration methods like activated carbon and sediment filters. Together they provide complete water treatment, and I noticed the difference across all faucets in my home.
How to Maintain a Whole Home Water Filtration System
At home, I always check for clogs when I notice reduced water flow in multiple areas of the house. This can indicate a clog in the system. I then check and replace cartridges or filter media if needed.
I also check periodically and inspect the entire system. Looking at gauges or meters can indicate issues. I make sure all connections are secure so there are no leaks.
For bigger jobs, I get a professional inspection. These systems can be complex, so it’s advisable to have a professional do an annual inspection. They handle maintenance tasks like changing large filter media or inspecting UV sterilizers if the system includes components like these.
My HomeWater’s UPSTREAM™ 4-Stage whole home water filter was engineered for ease and longevity. With features like automatic media backwashing and quick-change pre-filters, the system minimizes hassle and keeps my family safe.
How Often Should You Replace Filters in a Whole House System?
From my own use, I found that different components in a whole house system have different intervals for replacing. It can depend on several factors like the quality of the incoming water, how much is used, and the specific filters or treatments the system includes. I always read the manufacturer’s guidelines for accurate information.
For sediment pre-filters, these should be changed every 3 to 6 months, depending on the sediment levels in the water. I also use specialized filters for removing contaminants such as iron or chloramines. For these, I always check manufacturer’s guidelines on replacement intervals.
The system media like large media beds or tanks can have different filtering materials such as granular activated carbon (GAC), red flint, or KDF55. These often need replacement or re-bedding every 3 to 5 years, again depending on the system and the water quality that passes through it.
How Often Should a Water Filter Be Serviced?
I learned that doing preventative maintenance goes a long way for a complex whole house system. I have mine inspected annually so I can catch leaks or problems before they get worse.
In my area, hard water sometimes clogs the pipes, so I had my system serviced often and even got a water softener system installed. This made everything run smoothly and saved me from costly repairs.
Basic Home Water Filtration System Maintenance Tasks
The simplest way I found to guarantee filtered water from my faucet is by replacing the filter. Over the duration of a filter’s life, I saw how captured sediment accumulates fast. In my whole home cartridge filters, I had to replace them every three to six months. My under sink systems needed a new filter after about six months too.
The time to change the filter is always dependent on the quality of water I’m using. If I leave an old filter in the system longer, I run the risk of sediment flow past the filter because it cannot hold any more debris.
To ensure water safety, I always follow a regular schedule for changing the water filter. That habit keeps my family safe and my water clean.
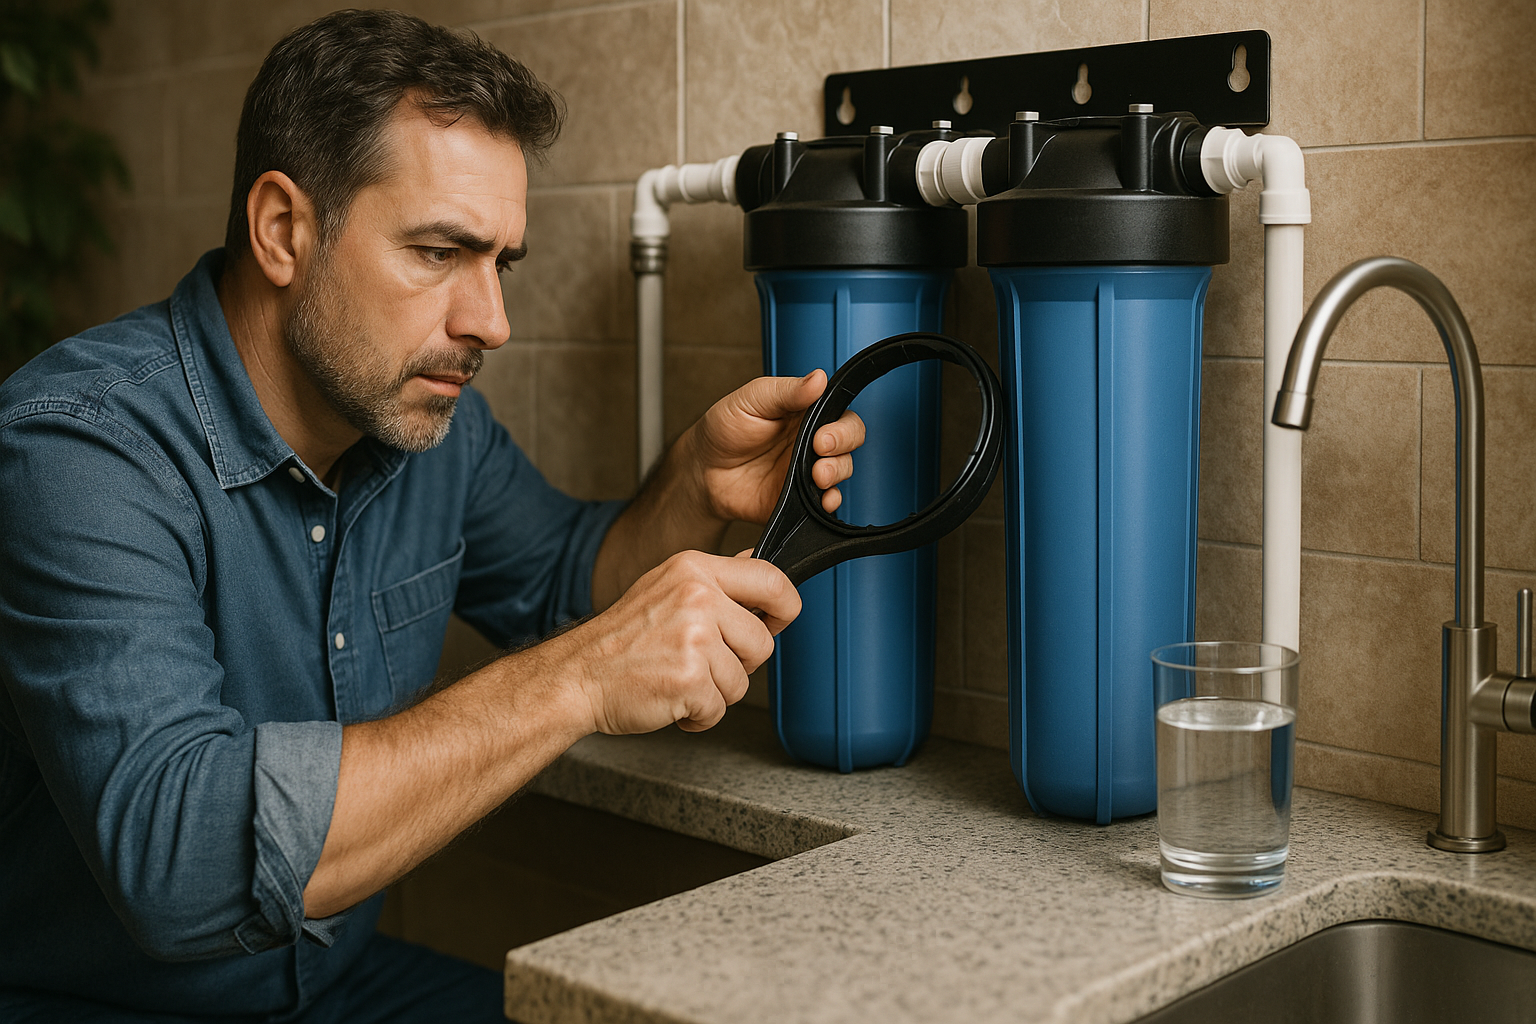
How to Change an Under Sink Filter
In my kitchen, I used EcoPure and Whirlpool under sink filtration units because they were easy to replace filters. The encased filter technology made the process more convenient for my water filtration system maintenance.
I start by giving the system a twist. The old filter turns counterclockwise a quarter turn, then I release it and pull it out. To finish, I twist the new filter clockwise into the slot.
I also replace the system’s battery so the light doesn’t die prematurely. When I worked with my reverse osmosis system, I had to purge water from the tank, letting it run for a few hours.
For bigger jobs like replacing the membrane every 2 years, I followed the same steps. If I had questions or concerns about a specific system I purchased, I would check the owner’s manuals page, download the operation manual, and make sure my system stayed on track.
How to Change a Whole Home System’s Filter
In many homes, I’ve seen whole home filtration systems handle an influx of sediment in water, sometimes causing damage internally to the home’s pipes and even slowing down water-using appliances. Compared to under sink units, the easiest water filtration system maintenance I could perform was just replacing the filter regularly. My BRWEFS whole home filtration system has a closed sump with a lid and latches that close securely.
Here’s how I do the change on my whole home system’s filter. First, I grasp the bottom of the sump and pivot upward slowly. Then I pull sump down to remove it from the head. Over a sink or waterproof surface, I unsnap the lid clamp, pulling the latches in opposite directions but not taking apart the clamp halves. Next, I detach the lid and remove the used filter cartridge from the sump. I always throw away the old filter after.
I also check the sump to be dry and free of debris. Before adding a new filter, I remove protective caps, then insert new cartridge into the sump. I align filter cartridge in the sump, ensuring triangular points on the filter match the notches inside the sump. Finally, I attach lid, snap latches together, insert filter ports back into the system, and pivot the sump into the service position.
Open Sump Whole Home Filter Change
I learned that filter changes for an open sump whole home water filtration system are a bit different but still easy. These open sump systems can use large standard capacity replacement filters. The filter change process I follow goes step by step.
First, I turn water supply off and release pressure in the filter by pressing the vent valve on top of the filter head or by opening a cold water faucet downstream of the filter. Next, I turn the sump left to remove it from the head. I stay careful, since the sump is full of water. I don’t want to lose the large o-ring seal.
Then I ensure the inside sump is clean. I wash with warm soapy water and then rinse. After that, I remove wrapper from the new filter cartridge and insert filter cartridge into the sump. Some cartridges fit either way, while others only one way, so I always follow the instructions on the wrapper.
I also lightly lubricate the o-ring seal in the sump with silicone grease so it stays seated in the groove. Then I hold sump up to the filter head, aligning center hole of the cartridge with the protrusion bottom head. If the sump won’t tighten, the cartridge may be upside down or not centered, so I check orientation. Once right, I stay careful not to cross-thread, and I turn sump right onto the filter head and tighten securely without overtighten.
Next, I partially open house faucet downstream of the filter housing. Then I slowly open water supply shutoff valve and let the filter housing fill with water. While it is filling, I press filter vent valve to release air in the filter. I then close faucet and check leaks between sump and head.
Whether I’m working with an open or closed sump whole home filters, I know they need to be purged to release loose material in the new filter. I do this by running faucet in my home for at least 5 minutes. If I run into troubleshooting questions, I go to the owner’s manuals page to fix system’s maintenance issue.
Whole Home Water Filtration System Maintenance
I have used Whirlpool and Brita Central Water Filtration systems, and I found the maintenance to be simple. The internal filter is programmed to cleanse itself every 14 days. It flushes, cleans, and drains the filter, so I don’t need to install new parts often.
The only water filtration system maintenance I really perform is when the weather dips or if the system isn’t used for more than a month. That’s when I check and make sure everything is running properly.
Whole Home Filtration System Maintenance Before Vacation
When my home was unoccupied for more than a month, I had to turn off my home’s water so the filtration unit would not receive water. I also made sure to turn Clean Rinse function off, otherwise the same water would be filtered every 14 days. After vacation, I turned Clean Rinse function back on and did a couple of running filtration cycles manually before I started to return home water use.
Another option I tried was unplugging the unit and draining excess water from the system. This step is important if there is potential for the water in the unit to freeze. Doing this gave me peace of mind during winter trips.
How to Prevent Your Water Filtration System From Freezing
At my summer cabin near the lake, I had a Central Water Filtration system. In cold weather, there was always a risk of the water freezing inside the system if it was not drained. The excessive weight of the frozen unit was a real hazard because of its size.
I always asked people helping me to drain the system safely. This way, I could protect myself and also protect the system from slipping out of my hands and shattering on the ground.
How to Drain Water from the Unit
When I had to close the shut-off valve on my house’s main water pipe, I learned it was simple if I did each step slowly. First, I would open a faucet to let the pressure ventilate in the unit. Then I would shift the stem in the bypass valve to the bypass position. With a 3-valve bypass system, I had to close inlet and outlet valves, then open the bypass valve.
After that, I would unplug the power supply, remove the cover and the drain hose. I had to remove holding clips on the inlet and outlet and then separate the system from the bypass valve. I placed a piece of wood, about two inches thick, near the floor drain. I would move the system close, then tip the rim onto the piece of wood, making sure the inlet and outlet lined up over the drain.
I never let the weight of the system rest on the inlet and outlet. I would tip the bottom of the system a few inches to drain water. Once the system was draining, I left it laying on the piece of wood in a horizontal position with the inlet and outlet off the ground.
When I would return home and start the central water filtration system again, I would lift the system upright into position and reconnect the system to the bypass valve. By following drain instructions in reverse order, I would check leadwire connectors, make sure they were secure, and confirm the wiring valve gear was safe. Then I would plug the system back into the power source. The system automatically did a Clean Rinse cycle and would return to normal operation.
As someone who cares about water, I always keep a checklist for water filtration system maintenance steps. With proper maintenance, my filtration unit lasted for many years. I also kept a list of maintenance tips and tricks, and when needed, I went to my unit’s installation guide or the owner’s manuals page.
What Are General Tips for Water Filtration System Maintenance?
From my experience, a good idea is to stay on the lookout for leaks or clogs. If I notice a difference in the water pressure or the quality of water, I take a few minutes to inspect the system. A simple visual inspection helps me catch leaks, mold, or any signs of wear and tear.
If I haven’t run water through the filter for a few days, I make sure to run the tap for a few minutes before I take a drink. I also read the owner’s manual and set reminders in my calendar. This way, I don’t forget about maintenance.
I always follow the recommended timeline for preventative maintenance. Doing this has given me healthy water at my tap for many years.
Water Filter Maintenance Can Be Easy and Affordable
I discovered the real benefits of having a high–quality water filtration system in my home. Even with occasional water filter maintenance, it never felt like a deterrent. Many customers like me are busy, which is why I love the smart design of my American-made water filtration systems. They are built with maintenance in mind.
The top-loading designs prevent spills, and the pre-filters can be changed in just 20 seconds. It made the work easy. The whole job fits into daily life while still giving me the best-tasting water without the fuss. My HomeWater unit made this possible, and when I needed help, the HomeWater EZChange 2-Stage Under Counter Under Sink Water Filter came through. It installs in just 15 minutes under my sink, using the existing faucet line without cutting into the countertop.
With the patented EZChange system, I can replace filter cartridges fast. This 2-stage system removes chlorine, lead, rust, dirt, particulate matter, and improves taste and odor. Since there’s no tank or additional faucet required, I get delicious clean water imaginable without the daily grind. For anyone unsure, I’d say give HomeWater a try today.
Disclaimer:
This content is shared for general informational purposes only. It is based on personal experience and commonly available knowledge about water filtration maintenance. It should not be taken as professional, technical, or legal advice. Every home and filtration system is different, so results may vary. For specific issues or complex situations, readers should consult a qualified technician or expert before taking action.