- Introduction
- What is an Ultrasonic Cleaner?
- Can You Use a Sonic Cleaner for Sprayer Tips?
- How to Use an Ultrasonic Cleaner for Sprayer Tips
- Best Cleaning Solutions for Ultrasonic Cleaners
- Benefits of Cleaning Sprayer Tips with Ultrasonic Cleaners
- Dos and Don’ts of Using Ultrasonic Cleaners for Sprayer Tips
- Safety Considerations When Using Ultrasonic Cleaners
- Alternative Cleaning Methods for Sprayer Tips
- Conclusion
Introduction
Maintaining sprayer tips is essential for effective spraying and ensuring long-lasting equipment. Dirty or clogged sprayer tips can reduce the efficiency of pesticide, herbicide, or fertilizer applications, leading to uneven coverage and potential crop damage. Regular cleaning keeps spray patterns consistent and reduces downtime during spraying operations.
One cleaning method that has gained popularity is using a sonic cleaner—commonly known as an ultrasonic cleaner. It is known for its effectiveness in removing built-up debris, residues, and blockages in sprayer tips. This cleaning technique uses sound waves to create vibrations in a cleaning solution, effectively loosening and removing dirt, chemical residues, and other contaminants from the tiny openings of the spray tips.
An ultrasonic cleaner provides several benefits, especially for those dealing with stubborn build-up or hard-to-reach areas in sprayer nozzles. This cleaning method not only restores the spray tips to a near-original condition but also improves spraying accuracy. Additionally, using a sonic cleaner minimizes the risk of damaging the delicate orifices of the tips, which can happen with harsh manual cleaning methods
What is an Ultrasonic Cleaner?
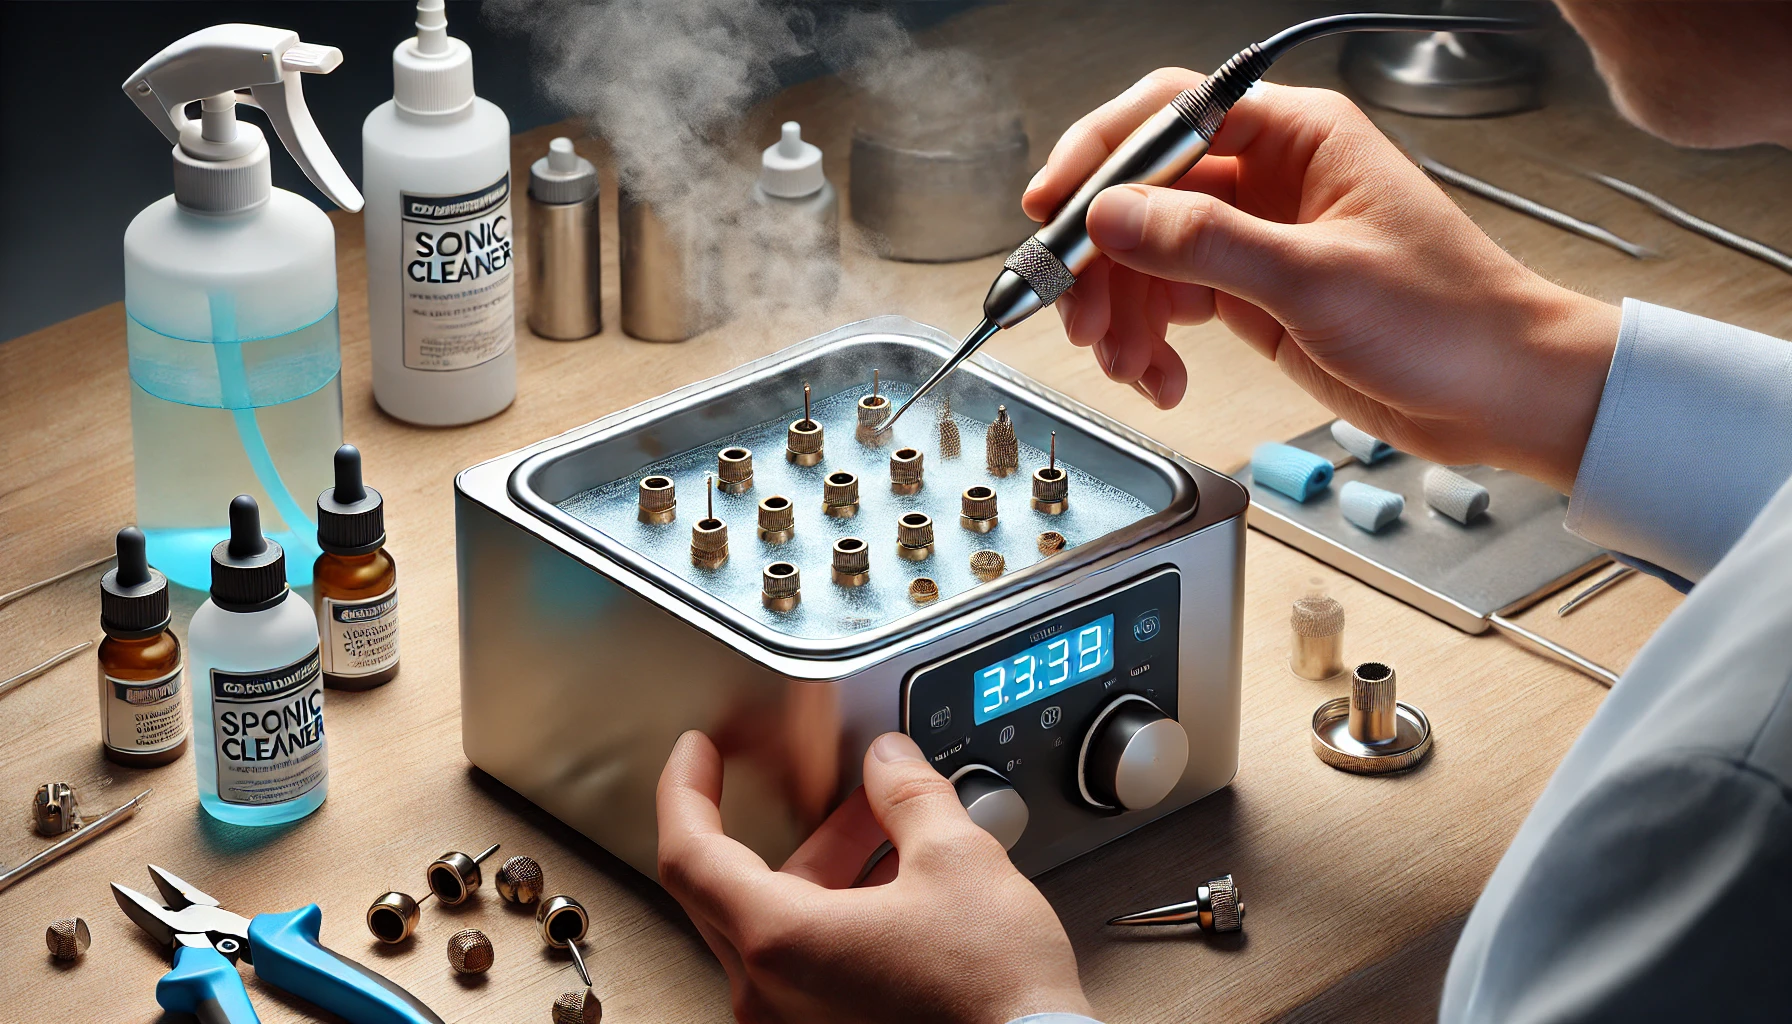
An ultrasonic cleaner is a device designed to clean small or intricate objects by using sound waves to create vibrations in a liquid. These vibrations generate tiny bubbles in the cleaning solution, which then implode in a process called cavitation. This implosion creates energy that effectively loosens and dislodges dirt, residues, and other contaminants from surfaces. This process is especially useful for cleaning items with tiny openings or complex shapes, such as sprayer tips, where traditional cleaning methods might struggle
How It Works
Ultrasonic cleaners operate by emitting high-frequency sound waves (typically between 20-40 kHz) through the cleaning solution. These sound waves cause the liquid to vibrate, forming microbubbles. When these bubbles collapse, they release energy that scrubs contaminants off the surface of the item being cleaned. This cleaning method is gentle yet effective, reaching crevices and fine openings without damaging the material
Materials That Can Be Cleaned with Ultrasonic Cleaners
Ultrasonic cleaners are versatile and can be used to clean a wide range of materials, including:
- Metal (e.g., brass, steel, aluminum), commonly found in sprayer nozzles and tips.
- Plastic components, provided they are durable enough to withstand ultrasonic vibrations.
- Ceramic tips, which are often used in sprayers due to their resistance to corrosion and wear.
However, it is important to check the compatibility of materials with the ultrasonic cleaner and the cleaning solution being used. For sprayer tips specifically, ultrasonic cleaning is highly effective at removing residues like pesticide build-up, mineral deposits, and other blockages that can affect spray patterns and coverage
Can You Use a Sonic Cleaner for Sprayer Tips?
Yes, ultrasonic cleaners are highly effective for cleaning sprayer tips and nozzles. They are suitable for various types of sprayer tips, such as air induction, flat fan, and other precision nozzles used in agricultural and industrial spraying. Ultrasonic cleaning reaches deep into the small orifices of the nozzles, removing even the most stubborn residues
Ultrasonic Cleaners for Different Types of Sprayer Tips
- Air Induction Tips: These tips are designed to reduce drift by mixing air with the spray liquid. They have air intake holes that can easily get clogged with debris. Ultrasonic cleaners effectively clean these air channels without disassembly, making them a convenient option
- Flat Fan Tips: These nozzles are commonly used for broad spray coverage but can experience blockages from fine particles. Ultrasonic cleaning can clear blockages and maintain the correct spray pattern
- Ceramic and Plastic Tips: Ultrasonic cleaners are gentle enough for delicate materials like ceramic but still powerful enough to remove built-up residues. Plastic components can also be cleaned effectively if they are durable enough to withstand the cleaning vibrations
Types of Contaminants Removed by Ultrasonic Cleaners
- Pesticide Residues: Sprayer tips often get clogged with hardened pesticide deposits, which can be difficult to remove manually. Ultrasonic cleaning dissolves and breaks down these residues, restoring the nozzle’s efficiency.
- Mineral Deposits: Water with high mineral content can leave scale deposits inside the tips. The cavitation process in ultrasonic cleaners breaks up these deposits, preventing spray pattern distortion
- Blockages and Debris: Soil particles, plant debris, and other contaminants can accumulate in sprayer nozzles, blocking the spray flow. Ultrasonic cleaning removes this debris without damaging the nozzle structure, ensuring a smooth flow
How to Use an Ultrasonic Cleaner for Sprayer Tips
Ultrasonic cleaners are simple to use, but following the correct procedure ensures the best results. Here’s a step-by-step guide on how to clean sprayer tips effectively using a sonic cleaner:
Step-by-Step Guide
-
Remove Sprayer Tips from the Equipment
-
- Before starting, carefully remove the sprayer tips from the equipment. This prevents damage to the sprayer and allows for thorough cleaning of the nozzles.
-
Place Tips in the Cleaner’s Basket
-
- Place the tips in the ultrasonic cleaner’s basket. Do not place them directly on the tank bottom, as this can cause damage to both the tips and the tank through cavitation erosion. The basket also ensures that the tips remain submerged and optimally positioned for cleaning
-
Fill the Cleaner with Water-Based Detergent
-
- Use a water-based detergent solution, as it is effective and safe for the cleaning process. Avoid solvents, as they can damage the cleaner or pose safety risks. The detergent helps break down residues like pesticides, minerals, and other contaminants
-
Set the Correct Temperature and Timer for the Cleaning Cycle
-
- Adjust the ultrasonic cleaner’s temperature settings, typically between 120°F to 140°F, which helps enhance cleaning efficiency. Set a timer, usually for 10-20 minutes, depending on the level of contamination. For tough, non-water-soluble residues, you may need a longer cleaning cycle or repeat the process
-
Run the Cleaner and Monitor Progress
-
- Start the cleaning cycle and monitor the progress to ensure that the sprayer tips are getting cleaned. You may notice debris dislodging from the tips. If residues remain after the initial cleaning cycle, you can extend the cleaning time until the tips are clear. Always allow the cleaner to cool down before starting another cycle if needed
Best Cleaning Solutions for Ultrasonic Cleaners
Using the right cleaning solution is essential for effective ultrasonic cleaning of sprayer tips. A suitable solution not only ensures thorough cleaning but also prevents damage to the ultrasonic cleaner and the tips.
Recommended Water-Based Detergents for Ultrasonic Cleaning
- Mild Dish Soap (e.g., Dawn Dish Soap)
- This is one of the most commonly used cleaning agents for ultrasonic cleaners. It is safe for both metal and plastic sprayer tips and effectively breaks down pesticide residues and grime
- Specialized Ultrasonic Cleaning Solutions
- You can also opt for commercial ultrasonic cleaning solutions specifically designed for spray equipment. These solutions are formulated to break down stubborn contaminants like mineral deposits and chemical residues while being gentle on the materials of the sprayer tips
- Neutral pH Detergents
- Neutral pH detergents are recommended because they are less likely to cause corrosion or damage to the materials of sprayer tips. They work well in cleaning organic residues, as well as oil and grease deposits
How to De-Gas the Cleaning Solution
De-gassing the cleaning solution improves the efficiency of the ultrasonic cleaning process. Here’s how to do it:
- Fill the Tank with Solution
-
- Add the selected water-based detergent solution to the ultrasonic cleaner’s tank, ensuring it is filled to the recommended level.
- Set the Temperature
-
- Adjust the temperature to the optimal setting (typically 120°F-140°F), as this helps release trapped gases from the solution.
- Run the Cleaner Without the Parts
-
- Start the cleaner and run it for about 5-10 minutes without placing the sprayer tips inside. This allows the dissolved gases, mainly air, to escape from the liquid. De-gassing ensures better cavitation, leading to more effective cleaning results
Using the right detergent and de-gassing the solution properly enhances the cleaning efficiency, ensuring your sprayer tips come out residue-free and ready for use.
Benefits of Cleaning Sprayer Tips with Ultrasonic Cleaners
Ultrasonic cleaners offer several advantages for maintaining sprayer tips, ensuring that they function efficiently and last longer. Here are the key benefits:
1. Improved Spray Patterns and Accuracy
- Clean sprayer tips are essential for maintaining consistent spray patterns and accurate applications. When sprayer tips are free from blockages and residue buildup, they deliver even spray coverage. Ultrasonic cleaners remove debris from the tiny orifices of the tips, ensuring that the spray emerges in a uniform pattern
2. Extended Life of Sprayer Tips
- Manual cleaning of sprayer tips can be abrasive, potentially wearing down the delicate parts of the nozzles over time. Ultrasonic cleaners, on the other hand, use sound waves to clean without physical contact, minimizing wear and tear. This gentle yet thorough cleaning method helps extend the life of sprayer tips, reducing the need for frequent replacements
3. Efficient Removal of Chemical Buildup
- Pesticides, herbicides, and fertilizers can leave stubborn residues that are tough to remove with conventional cleaning methods. Ultrasonic cleaners are effective at breaking down and removing these chemical deposits, preventing blockages that can affect spraying performance. This ensures consistent and reliable spraying with minimal interruptions
By regularly cleaning sprayer tips with ultrasonic cleaners, you can achieve better spraying results, save on maintenance costs, and ensure that your equipment remains in optimal working condition for longer periods.
Dos and Don’ts of Using Ultrasonic Cleaners for Sprayer Tips
Proper use of ultrasonic cleaners ensures effective cleaning while protecting both the equipment and the operator. Follow these dos and don’ts for optimal results and safety.
Dos
-
Use Warm Water-Based Solutions
-
- Always use a water-based cleaning solution, ideally with mild detergent. Warm water enhances cleaning efficiency by helping to break down residues faster. This approach ensures thorough cleaning without damaging the sprayer tips
-
De-Gas the Solution for Better Results
-
- De-gassing the cleaning solution is important for optimal cavitation. Running the cleaner for a few minutes before placing the tips inside allows trapped gases to escape, resulting in more effective cleaning
-
Use Gloves and Handle with Care to Avoid Contamination
-
- When handling sprayer tips, use gloves to avoid skin contact with chemicals and contaminants. This also helps prevent recontamination of the tips after cleaning. Gloves protect both the user and the equipment, ensuring safe and clean handling
Don’ts
-
Avoid Using Solvents or Flammable Liquids
-
- Solvent-based cleaners can damage the ultrasonic cleaner’s tank and pose safety risks. Use only recommended water-based detergents to ensure safe operation and prevent accidents
-
Do Not Place Parts Directly on the Cleaner’s Tank Bottom
-
- Placing parts directly on the tank bottom can cause cavitation damage to both the tips and the tank. Always use the provided basket to hold the sprayer tips during the cleaning process, preventing direct contact with the tank
-
Never Operate the Cleaner Without Sufficient Liquid in the Tank
-
- Ensure the cleaning solution reaches the recommended level before operating the ultrasonic cleaner. Running the unit without enough liquid can damage the transducers and reduce the cleaning efficiency
By following these dos and don’ts, you can effectively use ultrasonic cleaners for sprayer tips while ensuring safety and maintaining equipment longevity.
Safety Considerations When Using Ultrasonic Cleaners
When using ultrasonic cleaners for sprayer tips, personal safety and proper handling are essential to prevent accidents and ensure effective cleaning.
Personal Safety: Wear Gloves and Goggles
- Gloves: Always wear protective gloves when handling sprayer tips and cleaning solutions. Gloves protect your skin from potential irritation caused by detergents and from chemical residues on the tips. They also prevent recontamination of the cleaned parts
- Goggles: Ultrasonic cleaners use water and detergents, which can splash during the cleaning process. Wearing goggles protects your eyes from accidental splashes of contaminated liquid or cleaning solutions. Goggles are especially important when disposing of the rinse solution, as it may contain pesticide residues.
Proper Handling of the Cleaning Solution
- Use Water-Based Solutions: Stick to water-based detergents, as solvents can be hazardous and damage the cleaning equipment. Water-based solutions are safer for both the user and the ultrasonic cleaner
- Monitor the Cleaning Solution’s Temperature: Ultrasonic cleaners heat the solution to improve cleaning efficiency, but high temperatures can pose burn risks. Always use thermal gloves when handling the tank or parts if the solution is heated
Safe Disposal of Rinse Waste
- Collect and Dispose of Rinse Water Safely: After cleaning, the rinse water may contain pesticide or chemical residues from the sprayer tips. Collect the rinsate in a designated container to avoid contaminating the environment. Follow local regulations for the safe disposal of chemical waste
- Avoid Draining Directly: Never drain the contaminated solution into sinks or sewer systems, as it can lead to environmental hazards. Check for appropriate disposal facilities or methods in your area to handle the waste properly
By following these safety considerations, you ensure a safer cleaning process while maintaining the effectiveness of your sprayer tips and protecting the environment.
Alternative Cleaning Methods for Sprayer Tips
While ultrasonic cleaners are highly effective, there are alternative methods to clean sprayer tips. Here’s a look at some manual cleaning techniques and how they compare to ultrasonic cleaning in terms of effectiveness, time, and effort.
Manual Cleaning Techniques
-
Using Brushes
-
- One of the most common methods is to use a soft-bristle brush to manually scrub the sprayer tips. This helps remove visible debris and residues but can be time-consuming and may not reach deep into the tiny orifices of the tips.
- Brushes are effective for removing loose debris but can cause wear on delicate parts over time if used too aggressively.
-
Soaking in Warm Soapy Water
-
- Soaking the sprayer tips in warm soapy water is another common method. It softens and loosens the build-up, making it easier to remove residues manually.
- This method is less effective for removing stubborn blockages and requires more time, as the tips may need to soak for several hours to achieve decent results.
Comparison with Ultrasonic Cleaning
-
Effectiveness
-
- Ultrasonic cleaning is more thorough than manual methods, as it can reach into the fine channels and openings of the sprayer tips without damaging them. Manual methods often miss deeper residues that can affect spray patterns.
- Brushes and soaking may remove surface dirt, but ultrasonic cleaning can eliminate built-up chemicals, mineral deposits, and debris that block the tips over time.
-
Time and Effort
-
- Ultrasonic cleaning is quicker and less labor-intensive. It typically takes 10-20 minutes per cycle, with minimal effort from the user. In contrast, manual scrubbing and soaking require significant time and effort, often resulting in less effective cleaning.
- Soaking and brushing also demand constant supervision, while ultrasonic cleaning allows for a more hands-off approach.
Conclusion
Using an ultrasonic cleaner to maintain sprayer tips offers several advantages, such as improved spray accuracy, extended tip lifespan, and effective removal of chemical residues. Ultrasonic cleaning is gentle yet thorough, making it suitable for different types of sprayer nozzles, including air induction and flat fan tips. It also minimizes the physical wear and tear that often comes with manual scrubbing. By incorporating regular ultrasonic cleaning into maintenance routines, sprayer performance remains consistent, resulting in more efficient pesticide, herbicide, or fertilizer applications.
Regular cleaning is crucial to prevent clogs, uneven spray patterns, and equipment downtime. Implementing proper cleaning methods not only improves spraying results but also prolongs the life of the equipment, reducing maintenance costs in the long run. If you’ve used ultrasonic cleaners for sprayer tips or have other cleaning tips, please share your experiences in the comments below.
Thank you for visiting our Blog! For more engaging content, please check out the related category.


