If you’ve played Minecraft for more than a few hours, you’ve probably seen your favorite pickaxe or sword slowly wear down. Every swing, every block you mine, chips away at its durability. And let’s be honest—nothing feels worse than watching a fully enchanted diamond tool snap in the middle of a big project. That’s why knowing how to repair tools in Minecraft is just as important as knowing how to craft them in the first place.
Repairing tools isn’t just about saving resources. It’s also about preserving enchantments you worked hard for, stretching the life of rare gear, and keeping your gameplay smooth without interruptions. In fact, players who understand repair mechanics usually progress faster because they don’t waste time constantly crafting replacements.
In this guide, I’ll walk you through every practical method of repairing tools in Minecraft—from the basics all players should know, to the advanced tricks that seasoned players (and technicians like me) rely on. We’ll cover Java Edition, Bedrock, enchanted tools, mending enchantments, anvils, and even the common mistakes that cost players their best gear.
So whether you’re holding a plain iron shovel or a fully enchanted Netherite sword, by the end of this article you’ll know exactly how to keep it in top shape, avoid losing enchantments, and save both your resources and your hard-earned XP.
Understanding Tool Durability & Repair Basics
What Is Tool Durability?
Every tool in Minecraft—whether it’s a wooden pickaxe or a Netherite sword—comes with a hidden durability bar. This bar measures how many times the tool can be used before it breaks.
- Wooden tools: lowest durability, break very quickly.
- Stone tools: last a bit longer but still wear down fast.
- Iron tools: decent balance of strength and durability.
- Diamond tools: much tougher, lasting thousands of uses.
- Netherite tools: the strongest in the game, with the highest durability and resistance to fire and lava.
Once the durability hits zero, the tool snaps and disappears permanently. That’s why repairing before a tool breaks is essential—especially when it’s enchanted or made from rare materials.
Mechanics Of Repair: The Vanilla Rules
Minecraft gives you a few built-in ways to fix tools without mods.
- Crafting Grid Repair
- Place two damaged tools of the same type and material in the crafting grid.
- The result is a single tool with combined durability, plus a small repair bonus (around 5% of the tool’s maximum durability).
- This method is simple, but it strips enchantments, making it best for unenchanted gear.
- Grindstone Repair
- Works the same way as the crafting grid—combine two damaged tools.
- Also restores durability with the same small bonus.
- The catch: it removes all enchantments, which can be useful if you want to clear bad ones, but risky if you want to keep valuable enchantments.
Key Limits And Trade-Offs
- Enchantments at Risk: Both the crafting grid and grindstone will wipe enchantments from your tools. This makes them poor choices if you’re working with enchanted gear you want to keep.
- Anvil Repair Costs: Anvils let you preserve enchantments, but every time you repair the same item, the experience level cost increases (this is called the work penalty). Eventually, you’ll see the message “Too Expensive!” which means you can no longer repair that tool through the anvil.
- Java vs Bedrock Differences: In Java Edition, the anvil work penalty stacks faster, so tools reach the “Too Expensive” point sooner. In Bedrock Edition, the system is slightly more forgiving, letting you repair enchanted gear more times before hitting the cap.
Main Ways To Repair Tools In Minecraft
Crafting / Manual Combination
Crafting Table Repair
- Place two of the same tool type and material into the crafting table.
- The result is one tool with combined durability plus a small repair bonus (about 5% of maximum durability).
- When to use it: Best for unenchanted tools you don’t mind combining. Avoid this for enchanted items since all enchantments will be lost.
Grindstone Repair
- Works very similarly to the crafting table. Place two tools of the same type and you’ll get one repaired tool.
- The grindstone also clears enchantments, which can be both helpful and harmful:
- Useful if you want to wipe out unwanted enchantments.
- Risky if you want to keep valuable ones.
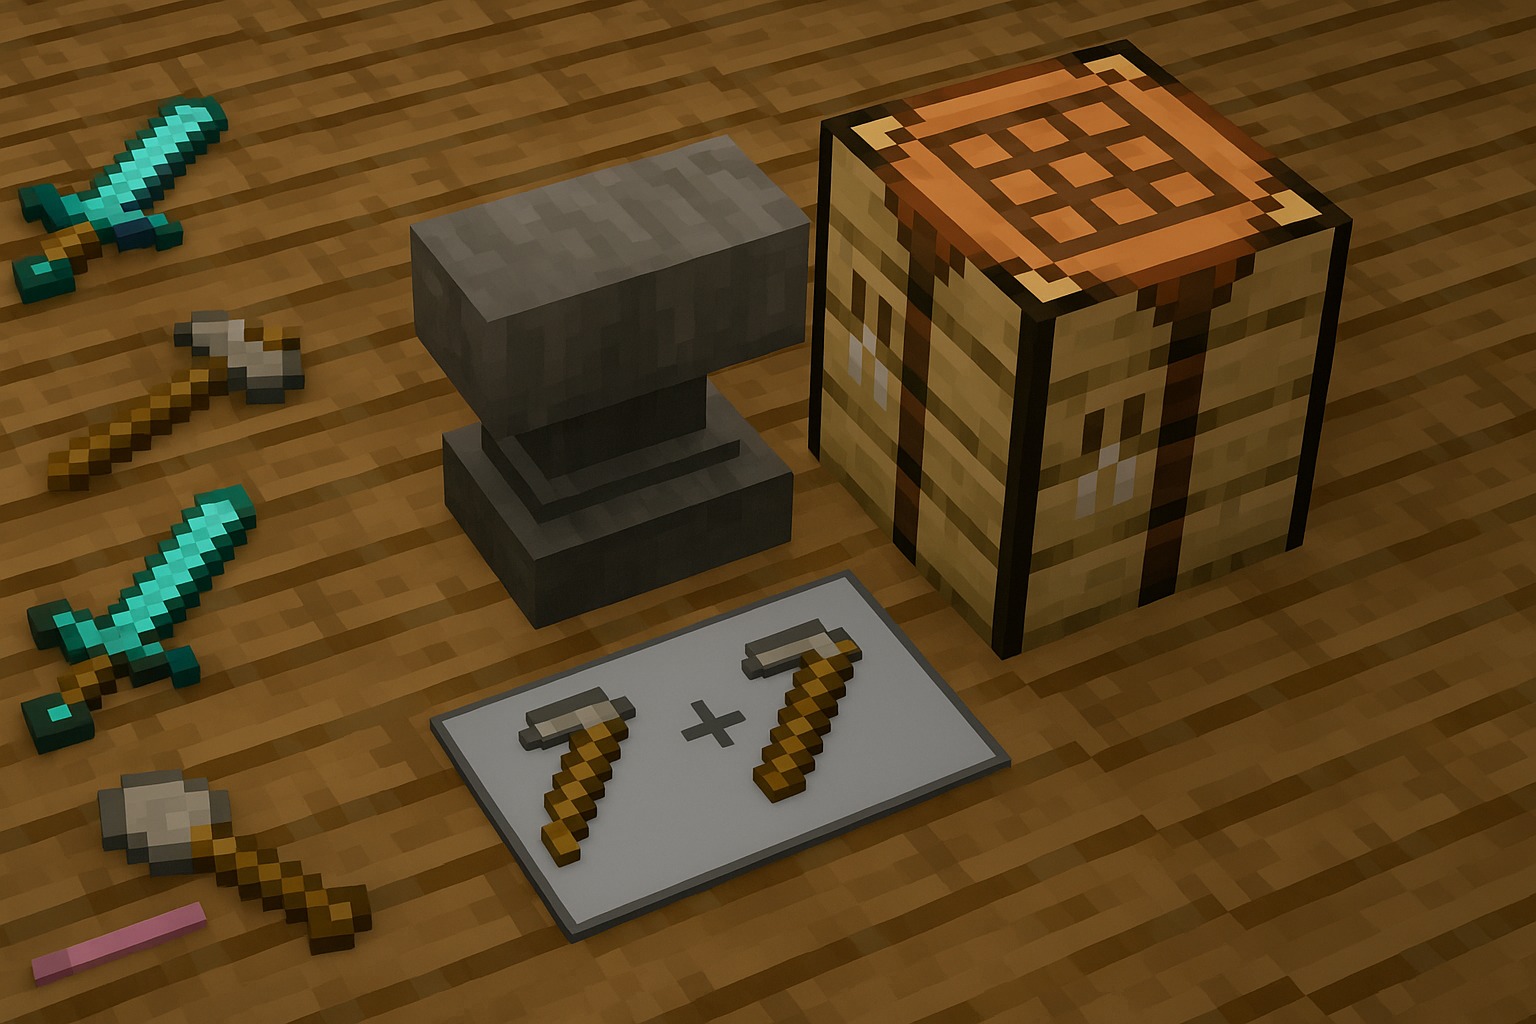
Anvil Repairs
The anvil is the most versatile and professional method for repairing tools, especially enchanted gear.
Tool + Tool
- Combine a damaged tool with another of the same kind.
- Durability is added together, and enchantments are preserved or merged if compatible.
- Example: Combine two enchanted diamond swords to keep enchantments (sometimes even get both if they’re different but compatible).
Tool + Material (Unit Repair)
- Instead of combining tools, you can repair one by adding its base material:
- Wooden tools → wooden planks
- Stone tools → cobblestone
- Iron tools → iron ingots
- Diamond tools → diamonds
- Netherite tools → netherite ingots
- This is efficient because you don’t need another tool, just a small number of raw materials.
Cost Mechanics
- Anvil repairs cost experience levels. Each repair increases the work penalty, meaning the same tool becomes more expensive to repair over time.
- Eventually, you’ll hit the dreaded “Too Expensive!” message, making further repairs impossible.
- Pro tip: Rename your tools early using the anvil. This slightly helps manage work penalty buildup and makes it easier to track your best gear.
Using The Mending Enchantment
How Mending Works
- Mending is a treasure enchantment that restores tool durability whenever you collect XP.
- Instead of XP going into your player level, it goes directly into repairing the equipped tool.
How to Get Mending
- It cannot be obtained through a standard enchanting table. Instead, you’ll find it by:
- Looting chests in structures (dungeons, temples, strongholds).
- Fishing (rare chance).
- Trading with librarian villagers.
Best Way to Use Mending
- Keep the tool equipped while gathering XP from mobs, mining ores, or farming.
- Build an efficient XP farm (like a mob grinder or fishing setup) to keep your enchanted gear always repaired.
- Pair Mending with Unbreaking for the strongest, longest-lasting tools.
Grindstone Specifics
The grindstone is a simple but situational repair tool.
- It lets you combine tools of the same type to restore durability, with the usual repair bonus.
- It also removes enchantments, turning enchanted gear into plain tools. This makes it useful for salvaging items when you want a “fresh start” or to recycle damaged enchanted gear into something new.
- When to use it:
- Clearing bad enchantments (like Curse of Vanishing).
- Quickly restoring plain tools without worrying about enchantments.
Edition-Specific Details & Special Cases
Java Edition Vs Bedrock Edition
Minecraft may look the same across platforms, but when it comes to tool repair, there are a few differences worth noting:
- Java Edition
- The anvil work penalty stacks faster. After a few repairs, tools can quickly reach the “Too Expensive!” point, making them unrepairable.
- Players often rely more on Mending enchantments to bypass this problem.
- Bedrock Edition
- The system is slightly more forgiving. Tools can usually be repaired more times on an anvil before hitting the cost cap.
- This makes anvil repair a bit more practical for long-term enchanted tools.
Repairing Tools Without Losing Enchantments
One of the biggest concerns for players is keeping their hard-earned enchantments intact.
- Safe Method: Always use an anvil if you want to preserve enchantments. The crafting grid and grindstone will wipe them out.
- Merging Enchantments: The anvil allows two enchanted tools to be combined, preserving or even stacking compatible enchantments. For example, combining a sword with Sharpness III and another with Unbreaking II could give you a sword that carries both.
- Expert Tip: Rename your tools on the anvil when repairing. It doesn’t stop enchantment loss directly, but it helps you track tools and slightly reduces long-term penalties.
The “Too Expensive!” Problem
If you’ve ever tried to repair your favorite enchanted pickaxe only to see “Too Expensive!” pop up, you’ve hit the repair cap.
- This happens because every repair adds a work penalty, increasing the XP cost.
- Once the cost goes above 39 levels, the game refuses the repair entirely.
- Solution: Apply the Mending enchantment early. With Mending, tools self-repair using XP, bypassing the anvil cost system.
Repairing Unique Tools & Special Items
Not all tools follow the same repair rules. Some require special materials or methods:
- Elytra → repaired with phantom membranes.
- Turtle Shell Helmet → repaired with scutes.
- Fishing Rods, Bows, and Crossbows → can be repaired by combining two of the same type.
- Shears, Flint & Steel → repaired with iron ingots.
Knowing these specifics can save you from wasting resources or losing rare gear.
Expert Tips, Tricks & Optimization
Maximize Efficiency With The Right Method
Not every repair method fits every situation. Here’s how I judge it in practice:
- Plain, unenchanted tools → Crafting grid or grindstone (cheap, fast, no XP needed).
- Enchanted tools → Always use an anvil to preserve enchantments.
- Late-game tools (diamond/netherite with Mending) → Focus on XP farms and Mending; anvils are a backup, not the main solution.
This way, you save resources and experience levels instead of wasting them on the wrong method.
Stack Enchantments For Longevity
One of the most powerful repair strategies is pairing Mending with Unbreaking.
- Mending repairs tools with XP.
- Unbreaking reduces how often durability decreases.
Together, they make tools practically unbreakable if you keep farming XP. Many veteran players don’t even bother with anvil repairs once they get this combo.
Manage Repair Costs Early
Anvils get expensive fast because of the work penalty. To stretch out their usefulness:
- Rename your tool the first time you use the anvil. This locks in its identity and slightly reduces repair cost increases.
- Avoid unnecessary repairs when durability is only halfway gone. Wait until the tool is closer to breaking to maximize the repair value.
- Merge enchantments smartly—instead of stacking books randomly, plan ahead to minimize anvil uses.
Build XP Farms For Mending
If you rely on Mending, you need a steady supply of experience. A few reliable farm setups:
- Mob farms: Skeleton, zombie, or blaze spawners are the classics.
- Villager trading halls: Certain trades give quick XP bursts.
- Fishing farms: More passive but still effective.
- Nether quartz mining: Quick and easy XP in the early game.
Having one solid XP farm means your tools can stay repaired indefinitely.
Backup & Inventory Management
Even with the best methods, tools can still break if you’re careless. A few technician-style habits:
- Keep backups: Always carry a secondary pickaxe or sword, especially when exploring.
- Name your tools: Not only does it help track them, but it also feels more personal—like you’re maintaining real equipment.
- Recycle broken gear: Don’t throw out half-broken tools. Combine them with others in a grindstone or crafting grid for extra durability.
Step-By-step: How To Repair Tools In Minecraft
Method 1: Crafting Grid Repair (for plain tools)
- Open your crafting table (or even the 2×2 crafting grid in your inventory).
- Place two damaged tools of the same type and material into the slots.
- Collect the repaired tool from the result box. It will have combined durability plus a small repair bonus.
🔧 Best for: Quick fixes on unenchanted tools.
⚠️ Warning: This wipes enchantments, so don’t use it on enchanted gear.
Method 2: Grindstone Repair
- Craft or place a grindstone (crafted from 2 sticks, 2 planks, and 1 stone slab).
- Put two damaged tools of the same kind into the grindstone slots.
- Take out the repaired tool. Durability will be combined with the usual bonus.
🔧 Best for: Salvaging tools and clearing enchantments you don’t want.
⚠️ Warning: All enchantments will be removed, including good ones.
Method 3: Anvil Repair (tool + tool)
- Place an anvil (crafted from 3 iron blocks and 4 iron ingots).
- Open the anvil interface and place your damaged tool in the first slot.
- Place another tool of the same type and material in the second slot.
- Collect the repaired tool, which keeps (and may even merge) enchantments.
🔧 Best for: Enchanted tools you want to preserve.
⚠️ Watch out: XP costs increase with each repair due to the work penalty.
Method 4: Anvil Repair (tool + material)
- Open the anvil and place your damaged tool in the first slot.
- Add the matching material in the second slot:
- Wooden tools → Wooden planks
- Stone tools → Cobblestone
- Iron tools → Iron ingots
- Diamond tools → Diamonds
- Netherite tools → Netherite ingots
- Collect the repaired tool.
🔧 Best for: Efficiently repairing without needing another full tool.
⚠️ Note: Still affected by work penalties and XP cost.
Method 5: Mending Enchantment Repair
- Obtain a Mending enchantment book (through loot, fishing, or trading with a librarian).
- Apply it to your tool using an anvil.
- Equip the tool and collect experience orbs (from mining, mobs, or farming).
- The XP will automatically repair the tool’s durability instead of going to your level.
🔧 Best for: Long-term gear maintenance, especially with Unbreaking.
⚠️ Tip: Always keep the tool in hand or in the off-hand slot while farming XP.
Less Common / Unusual Methods & Community Strategies
Enchanted Books & Smart Combining
Instead of always repairing tools directly, some players use enchanted books. Here’s how it works:
- Apply enchantments to books first.
- Later, combine the book with your tool using an anvil.
- This approach reduces repeated anvil use and slows down the work penalty buildup.
It’s a clever way to make sure your best tools stay strong without hitting “Too Expensive!” too quickly.
Bottles o’ Enchanting For Quick Repairs
In survival or multiplayer servers, you might come across bottles o’ enchanting. These items release XP when thrown, which can instantly repair Mending tools on the spot. Handy for emergency repairs during long mining sessions or battles.
Mob Farms And XP Loops
Advanced players often build dedicated mob farms not just for loot but also to keep their Mending tools constantly topped up. Blaze farms, Enderman farms, or even simple zombie grinders can provide a steady stream of XP to keep tools nearly unbreakable.
Modded Servers & Plugins
On some servers, special repair plugins or mods introduce new mechanics like repair kits, auto-repair gear, or custom recipes. While these aren’t part of vanilla Minecraft, they’re worth noting if you play on community servers where traditional anvil rules don’t always apply.
Recycling Damaged Tools
One overlooked strategy is to never throw away old, nearly broken tools. Combine them in a crafting table or grindstone for a small boost in durability. While you may lose enchantments, this trick is useful for clearing inventory clutter and squeezing out every bit of value.
Conclusion
Repairing tools in Minecraft is more than just a survival trick—it’s a skill that separates casual players from true craftsmen. Whether you’re combining items in a crafting table, carefully managing enchantments with an anvil, or setting up a Mending system powered by XP farms, every method has its place. Knowing which approach to use and when to use it saves time, resources, and most importantly, preserves the powerful enchantments that give your tools their edge.
As someone who’s worked with these mechanics countless times, my best advice is simple: treat your tools like real equipment. Don’t wait until they’re on the brink of breaking, and always plan ahead with Mending and Unbreaking for long-term reliability. Minecraft is about building and surviving, and your tools are the foundation of that journey. If you maintain them wisely, they’ll never let you down—no matter if you’re in Java, Bedrock, or deep in the Nether.
FAQ’s:
Why Does My Tool Say “Too Expensive!” On The Anvil?
This happens when the repair cost exceeds 39 experience levels. Every time you repair or combine a tool, the work penalty increases, making future repairs costlier. Eventually, the tool becomes unrepairable through an anvil.
Do I Lose Enchantments When Repairing?
- Crafting table or grindstone → Yes, all enchantments are removed.
- Anvil (tool + tool or tool + material) → Enchantments are preserved and may even merge if compatible.
Rule of thumb: Always use an anvil for enchanted gear.
Can Netherite Tools Be Repaired With Diamonds?
No. Netherite tools can only be repaired with Netherite ingots or by combining with another Netherite tool. Diamonds will not work.
Does The Unbreaking Enchantment Affect Repairs?
Unbreaking does not reduce repair costs, but it slows down durability loss. This means you’ll repair less often, saving materials and XP in the long run. Pairing Unbreaking with Mending is the best way to make tools last indefinitely.
Why Do I Get Less Durability Back Sometimes?
When combining tools, durability is added together with a small bonus of about 5% of maximum durability. If one tool is almost broken, the repair gain will still be limited.
Tip: Combine tools before they’re completely worn out to get better results.
Can I Repair Items Other Than Tools?
Yes! The same repair mechanics apply to many other items:
- Armor (iron, diamond, netherite, leather, turtle shells).
- Weapons (bows, crossbows, tridents).
- Elytra (repaired with phantom membranes).
- Shears and Flint & Steel (repaired with iron ingots).
What’s The Difference Between Java And Bedrock Repairs?
- Java Edition: Harsher anvil penalties. Tools become “Too Expensive!” after fewer repairs.
- Bedrock Edition: More forgiving—tools can usually be repaired more times before hitting the cap.
Thank you for visiting our Blog! For more engaging content, please check out the related category.
Disclaimer:
This guide on repairing tools in Minecraft is for informational and educational purposes only. Game features, mechanics, and updates may change over time depending on the version you play. Always check the latest official Minecraft resources for updated details.